

Upstairs bedrooms that bake in July. A furnace that never seems to stop in January. Icicles hanging from the gutters like a warning sign.
All three usually trace back to the same place: the space above your ceiling.
Good attic insulation is one of the cheapest, most reliable ways to make a house more comfortable and less expensive to run. This guide explains how to check what you have, how much you actually need, which material suits your attic, and whether to do it yourself or hire a pro.
The Short Answer
Most homes need attic insulation rated between R-30 and R-60, depending on climate. ENERGY STAR’s retrofit guidance suggests about R-30 in the hottest zone, R-49 in warm regions, and R-60 for most of the colder US.
Before adding any insulation, seal the air leaks in the attic floor. Then add blown-in fiberglass or cellulose on top of the existing layer until you reach your target depth, keeping vents, recessed lights, and chimneys clear.
For most homes, blown-in loose fill on the attic floor is the best value. Spray foam makes sense mainly when you want to insulate the roofline itself.
Why Attic Insulation Matters So Much
Heat always moves from warm to cold. In winter, it rises out of your living space and escapes through the ceiling. In summer, a sun-baked attic can get far hotter than the outdoor air and radiates that heat down into the rooms below.
The attic is also where the biggest air leaks hide: gaps around light fixtures, plumbing pipes, wiring holes, chimneys, and the attic hatch. Warm, moist air slips through them all winter long.
ENERGY STAR estimates that homeowners can save an average of about 15% on heating and cooling costs by air sealing and adding insulation in attics, floors over crawl spaces,s and basement rim joists.
There are comfort benefits too:
- More even temperatures between upstairs and downstairs
- Less strain on furnaces, heat pumps, ps and air conditioners
- Fewer ice dams on the roof in snowy climates
- A quieter house, since thick insulation dampens outside noise
Proper attic insulation won’t fix every comfort problem in a house, but it’s the right place to start for most homes.
Signs Your Attic Needs More Insulation
You don’t need an energy audit to spot the common warning signs.
You can see the ceiling joists. If the insulation is level with or below the top of the floor joists, there’s almost certainly not enough.
Upstairs rooms are much hotter or colder than the rest of the house.
Heating and cooling bills keep rising without a clear reason.
Ice dams form along the roof edge in winter, or snow melts on your roof faster than on your neighbors’.
The insulation looks thin, patchy, flattened, or dirty, especially in older homes.
Drafts and dust come from ceiling light fixtures or the attic hatch.
Older houses are the most likely to have thin attic insulation. Many homes built before the 1980s were insulated to much lower standards than today’s recommendations.
How to Check Your Current Attic Insulation
A quick inspection takes about 15 minutes.
Go Up Safely
Use a sturdy ladder and bring a flashlight. Step only on the joists or on a plank laid across them. Stepping between joists can put your foot straight through the ceiling below.
Wear a dust mask, gloves, long sleeves, and eye protection. In summer, go up early in the morning before the attic heats up.
Identify the Material
Look at what’s there. Fluffy pink, yellow,w or white material is usually fiberglass. Grey, paper-like material is cellulose. Long rolls or blankets are batts.
Stop if you see vermiculite. It looks like small, pebbly, grey-brown or silvery granules. Some vermiculite insulation was contaminated with asbestos, and the EPA advises homeowners not to disturb it. Leave it alone and call a licensed asbestos professional to test it.
Measure the Depth
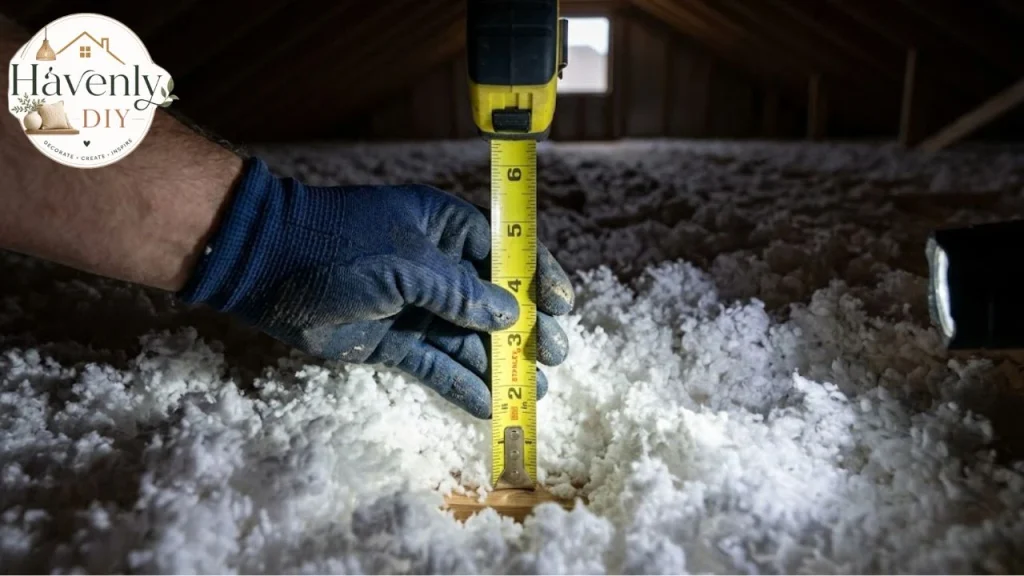
Push a ruler or tape measure down to the attic floor in several spots. Multiply the depth in inches by a rough R-value per inch for that material. ENERGY STAR’s rough factors are:
| Material | Approx. R-value per inch |
|---|---|
| Loose-fill fiberglass | 2.5 |
| Loose-fill rock wool | 2.8 |
| Loose-fill cellulose | 3.7 |
| Fiberglass batts | 3.2 |
| Vermiculite or perlite | 2.7 |
For example, 6 inches of loose-fill fiberglass is roughly R-15. In most US climates, that’s far below the target.
How Much Attic Insulation Do You Need?
The answer depends on where you live. ENERGY STAR groups the US into climate zones, from zone 1 (hot, like southern Florida) to zones 7 and 8 (very cold, like northern Minnesota and Alaska).
Its retrofit recommendations for attics look like this:
| Climate zone | Uninsulated attic | Attic with 3–4 inches already |
|---|---|---|
| Zone 1 | R-30 | R-25 |
| Zones 2–3 | R-49 | R-38 |
| Zones 4A–8 | R-60 | R-49 |
To find your zone, check ENERGY STAR’s climate zone map or your local building department.
In practice, R-49 means roughly 13–16 inches of loose fill and R-60 around 16–20 inches, depending on the material. Follow the coverage chart printed on the bags for the exact depth.
Can you have too much? Not in a harmful way, as long as vents stay clear. But each extra inch saves a little less than the one before it, so aim for your zone’s target rather than piling on indefinitely.
Types of Attic Insulation Compared
| Type | Best for | Pros | Cons |
|---|---|---|---|
| Blown-in fiberglass | Open attic floors | Affordable, doesn’t settle much, won’t absorb moisture | Needs more depth than cellulose for the same R-value |
| Blown-in cellulose | Open attic floors, filling gaps | Higher R per inch, made largely from recycled paper, treated for fire resistance.ce | Heavier, settles over time, can hold moisture if wet |
| Fiberglass or mineral wool batts | Easy-to-reach attics with regular joists | DIY-friendly, no machine needed | Gaps around obstacles cut performance |
| Open-cell spray foam | Insulating the roof deck | Air seals and insulates in one step | Expensive, professional install only |
| Closed-cell spray foam | Roof decks, tight spaces | Highest R per inch, adds moisture resistance | Most expensive, needs trained installers |
| Radiant barrier | Hot, sunny climates | Reflects roof heat in summer | Doesn’t replace insulation |
Blown-In Loose Fill
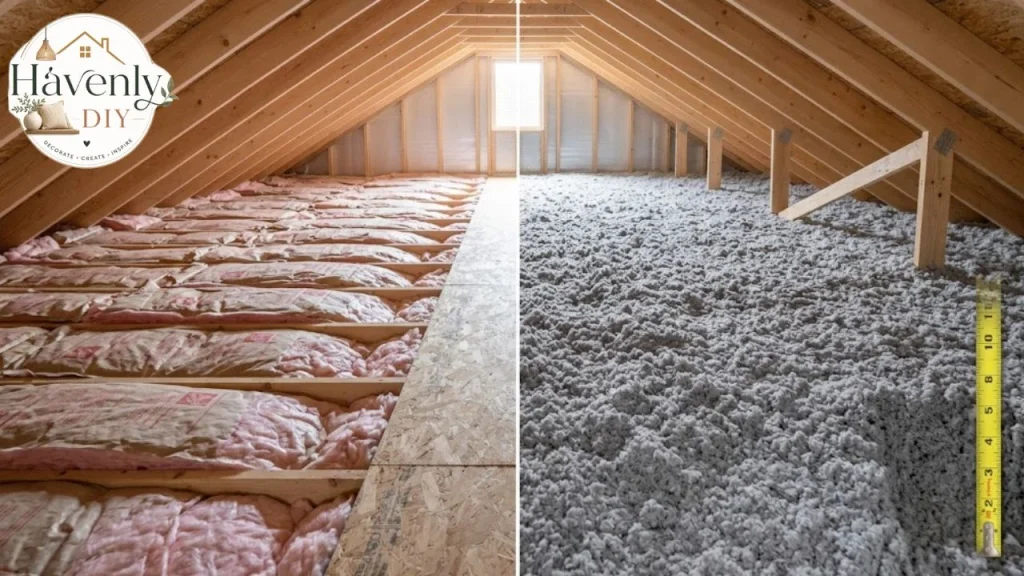
For most attic floors, blown-in fiberglass or cellulose is the best value. A machine spreads it evenly around joists, wires, and pipes, filling odd corners that batts leave open.
Cellulose packs more R-value into each inch, while fiberglass is lighter and settles less. Either works well when installed to the right depth.
Batts and Rolls
Batts are easy to handle and need no special equipment. They work best in attics with regular joist spacing and few obstructions.
When adding batts over existing insulation, lay them perpendicular to the joists and use unfaced batts. A paper or foil facing in the top layer can trap moisture.
Spray Foam
Spray foam is usually applied to the underside of the roof deck, turning the attic into a sealed, semi-conditioned space. This is called an unvented or encapsulated attic.
It can make sense when ductwork or an HVAC unit sits in the attic, or for complex roof shapes. It’s also a design change, not a simple top-up, so it should be planned by an experienced contractor who considers ventilation and moisture.
Radiant Barriers
Radiant barriers are reflective foil sheets stapled under the roof rafters. They reduce summer heat gain in hot, sunny climates, but they add little value in cold regions and never replace proper insulation.
Air Seal First: The Step Most People Skip
Insulation slows heat, but it doesn’t stop air. If warm air is leaking through gaps in the attic floor, it carries heat and moisture straight through even thick insulation.
That’s why air sealing comes first, while the attic floor is still easy to see.
Plumbing vent stacks and pipe holes: seal with expanding foam or caulk.
Electrical wire holes: use fire-rated caulk or foam.
Top plates of interior walls: seal the gaps where walls meet the attic floor.
Dropped ceilings and soffits over cabinets: cover large openings with rigid foam board and seal the edges.
The attic hatch or pull-down stairs: add weatherstripping and an insulated cover.
Around chimneys and flues, use metal flashing sealed with high-temperature caulk, never foam. Building codes require a clearance gap between combustible materials and chimneys, so check your local code or the manufacturer’s instructions. If you have a fireplace, our guide to fireplace hearths covers related safety basics.
One more check: make sure bathroom and kitchen exhaust fans vent outdoors through the roof or wall, not into the attic. Moist air dumped into an attic can lead to mold.
Don’t Forget Attic Ventilation
Insulation and ventilation work as a team. In a typical vented attic, cool outside air enters through soffit vents under the eaves, flows up under the roof deck, and leaves through ridge or gable vents near the peak.
That airflow does two jobs. In winter, it keeps the roof deck cold, so snow doesn’t melt on the warm roof and refreeze at the edge as an ice dam. All year, it carries away any moisture that sneaks up from the house.
Good attic insulation and air sealing reduce how much heat and moisture reach the attic in the first place. Ventilation clears out what’s left. If either one fails, problems follow.
Warning signs of poor ventilation include:
Frost on the underside of the roof deck in winter
Dark staining or mold on rafters or roof sheathing
Rusty nail tips poking through the roof deck
An attic that feels like an oven long after sunset in summer
If you see any of these, sort out the ventilation and moisture source before adding insulation. A roofer or home energy auditor can check whether your attic has enough intake and exhaust vents.
How to Add Attic Insulation Yourself
Topping up attic insulation with blown-in loose fill over an existing layer is a realistic DIY project for many homeowners. Plan for a full day, a helper, and plenty of dust.
Plan and Buy Materials
Measure the attic floor area and decide on your target R-value. The coverage chart on the insulation bags tells you how many bags you need for that area and depth.
Many home improvement stores lend or rent a blowing machine, sometimes free with a minimum insulation purchase. Ask before you buy.
Prepare the Attic
Lay plywood walkways across the joists so you can move safely. Install baffles (also called rafter vents) at the eaves so insulation can’t block the soffit vents. Air must flow from the soffits up to the roof vents.
Put up barriers or dams around anything that needs clearance: the attic hatch, chimneys,s and recessed lights that aren’t rated IC (insulation contact). Your electrician or the fixture label can confirm the rating.
Do not cover knob-and-tube wiring. This older wiring, common in homes built before the 1940s, can overheat under insulation. Have an electrician inspect or replace it first.
Mark Your Target Depth
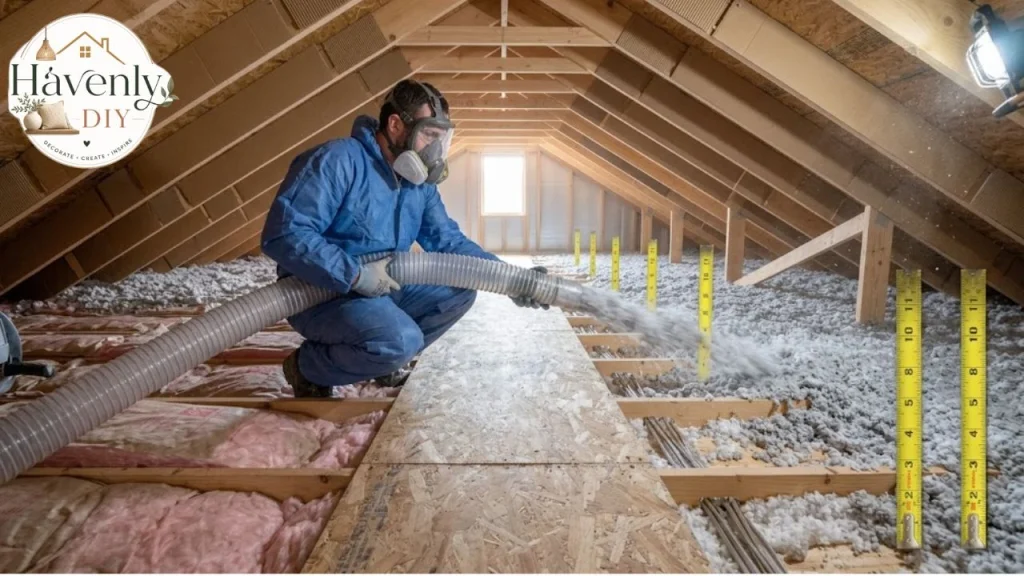
Staple depth markers or rulers to joists in several spots, so you can see when you’ve reached the right level. ENERGY STAR recommends depth markers to help future inspectors verify coverage too.
Blow In the Insulation
One person feeds bags into the machine while the other works the hose in the attic. Start at the far end and work back toward the hatch, holding the hose level and filling evenly.
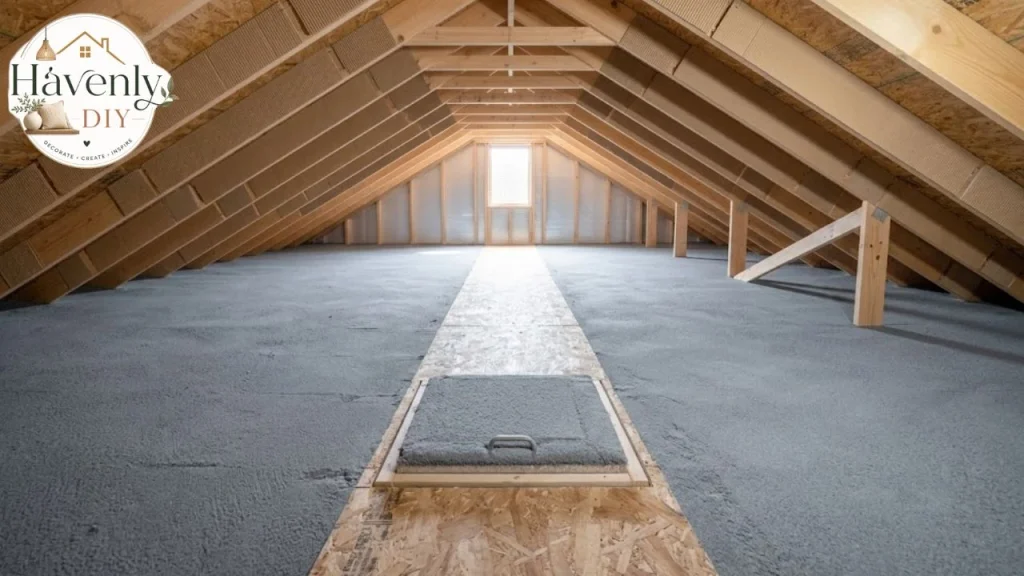
Aim for a smooth, even layer that reaches your markers everywhere, including the hard-to-reach edges near the eaves.
Finish and Check
Insulate and weatherstrip the attic hatch. Check that baffles are still clear and no insulation has fallen into soffit vents. Keep the receipts and bag labels for your records.
DIY or Hire a Pro?
DIY makes sense when the attic is easy to reach, has enough headroom, contains no vermiculite or knob-and-tube wiring, and you’re simply topping up an existing layer.
- The attic is cramped, very low, ow or hard to access
- You find mold, roof leaks, pests, sts, or water damage
- Old insulation needs removing
- You want spray foam or a sealed attic
- Ductwork or HVAC equipment is in the attic and needs sealing too
A good contractor will air seal first, check ventilation, and show you the final depth. Ask for the R-value and depth in writing on the invoice.
How Much Does Attic Insulation Cost?
The cost of attic insulation varies widely by region, attic size, access, and material. As a rough guide from current cost surveys:
| Project | Typical installed cost |
|---|---|
| Blown-in fiberglass or cellulose | About $1–$3 per sq ft |
| Typical attic top-up | About $1,700–$2,500 total |
| Spray foam | About $2–$5+ per sq ft |
| Removing old insulation | About $1–$2 per sq ft, plus disposal |
DIY can cut costs substantially, since materials are a fraction of the installed price. Air sealing, baffles,s and access problems add to any quote, so compare several written estimates.
What Happened to the Tax Credit?
You may still see websites advertising a 30% federal tax credit for insulation, worth up to $1,200 a year. That credit, the Energy Efficient Home Improvement Credit (Section 25C), ended for projects placed in service after December 31, 2025, under the One Big Beautiful Bill Act.
Projects completed in 2025 could still be claimed on that year’s return, but new projects in 2026 don’t qualify. Check with your utility company and your state energy office instead; some offer rebates or free energy audits.
Hot Climates vs Cold Climates
The basics stay the same everywhere, but the priorities shift with the weather.
In cold climates, the main goals are keeping heat in and stopping ice dams. Air sealing matters most here, because warm indoor air carries moisture that can condense on a cold roof deck. Reaching the full R-49 to R-60 target pays off over long heating seasons.
In hot climates, the attic itself becomes the problem. On a summer afternoon, roof heat soaks into the attic and radiates down through the ceiling for hours. Insulation slows that heat, and a radiant barrier under the roof can add a little extra help in very sunny regions.
Hot climates also tend to put ductwork and air handlers in the attic. Leaky ducts in a hot attic waste a surprising amount of cooled air, so ask a contractor to check and seal them when you insulate.
In mixed climates, you get both problems in different seasons. A sealed attic floor, insulation to your zone’s target, et and clear ventilation cover most situations well.
If you’re unsure which approach suits your home, a professional energy audit with a blower door test is the most reliable way to find the biggest leaks before you spend money.
Attic Insulation in Different Homes
Ranch homes often have long, low attics that are easy to insulate but hard to move around in at the edges. Our guide to ranch-style homes covers more of this layout.
Home additions often have separate attic spaces that get missed. If you’re planning or living with an addition, check that its attic is insulated to the same level as the main house.
Rooms with air conditioning problems are often a sign of thin insulation above. Before upgrading the AC, check the attic; our tips for keeping a room with AC comfortable pair well with better insulation.
Finished attics and bonus rooms need insulation in the sloped ceilings, knee walls, and the small attic spaces behind them, not just the floor. These spaces are tricky and often worth a professional assessment.
Common Attic Insulation Mistakes
Most attic insulation problems come from a handful of avoidable errors.
Skipping air sealing. Even thick insulation underperforms if air leaks through it.
Blocking soffit vents. Without baffles, insulation can choke attic ventilation and cause moisture and ice dam problems.
Compressing insulation. Packing batts tightly or storing boxes on top crushes the material and lowers its R-value.
Covering recessed lights that aren’t IC-rated. This is a fire risk. Check the rating or install approved covers.
Adding a vapor barrier on top. A facing or plastic sheet on top of existing insulation can trap moisture. Use unfaced batts or loose fill when topping up.
Ignoring wet or moldy insulation. ENERGY STAR advises that you can add new insulation over old unless it’s wet. Fix the leak and remove damaged material first.
Forgetting the hatch. An uninsulated hatch is a large hole in an otherwise well-insulated ceiling.
FAQs:
Can I put new insulation over old insulation?
Usually, yes. Adding new insulation on top of existing material is common and effective, as long as the old layer is dry and free of mold, pests, and vermiculite.
How long does attic insulation last?
Fiberglass and mineral wool can last for decades if they stay dry and undisturbed. Cellulose can settle over time, so check its depth every few years and top up as needed.
Is blown-in or batt insulation better for an attic?
For most open attic floors, blown-in insulation gives better coverage because it fills gaps around joists, wires,s and pipes. Batts work well in simple, easy-to-reach attics.
Should I remove old insulation before adding more?
Only if it’s wet, moldy, contaminated by pests or smoke, or if it’s vermiculite. Otherwise, adding new insulation on top saves time and money.
Does attic insulation help in summer?
Yes. It slows heat moving down from a hot attic into your rooms, which helps your air conditioner work less.
What R-value should my attic have?
Not federally. The 25C credit ended for projects placed in service after December 31, 2025. Check your utility and state for local rebates.