

Some walls just ask for more. A plain rental bedroom, a beige hallway, a bathroom that feels like an afterthought. Paint is one answer. Traditional wallpaper is another, if you have the patience for paste, a sponge, and a long afternoon.
Then there’s the shortcut that has quietly taken over: wallpaper that goes up like a giant sticker and, in theory, comes down the same way.
Peel and stick wallpaper can transform a room in an afternoon. It can also bubble, peel at the seams,s or pull paint off the wall if you choose the wrong product or skip the prep. This guide covers how it works, where it shines, where it struggles, and how to hang and remove it cleanly.
The Short Answer
Peel and stick wallpaper, also called self-adhesive or removable wallpaper, has a sticky backing instead of paste. You peel off the liner and press each panel onto a clean, smooth, fully cured painted wall.
It works best on smooth walls in dry or moderately humid rooms, such as bedrooms, living rooms, hallways, and accent walls. It struggles on heavy texture, fresh paint, and in steamy bathrooms or behind cooktops.
For the best result, clean and dry the wall, let new paint cure for several weeks, start with a plumb line, smooth each panel from the center outward, and overlap or butt seams according to the manufacturer’s instructions.
How Peel and Stick Wallpaper Works
Traditional wallpaper uses paste applied to the paper or the wall. Peel and stick wallpaper has a pressure-sensitive adhesive already on the back, protected by a release liner.
You remove a little of the liner, position the panel, and press it on gradually. Most products are repositionable for a short time, so you can lift and adjust if a panel goes on crooked.
When it’s time to change it, the adhesive is designed to release when you peel at a low angle, ideally leaving the wall underneath intact.
The phrase “ideally” matters. Removal depends on the product, your paint, how long the paper has been up, and how carefully you take it down.
Where Peel and Stick Wallpaper Works Best
Accent walls. One wall behind a bed, sofa, or dining table gives maximum impact for minimum material and effort.
Rentals. If your lease allows minor decorating, removable wallpaper is one of the most popular ways to personalize a space. Always check your lease and test a hidden spot first.
Bedrooms and living rooms. Dry, stable rooms with smooth walls are ideal.
Small spaces. Powder rooms, closets, alcoves,es and entryways need only a few rolls, so you can use a bold pattern without a big bill.
Furniture and surfaces. Many people use it to line drawers, bookcase backs, cabinet doors, and stair risers.

Where It Struggles
Textured walls. The adhesive needs full contact. On orange-peel, knockdown, or other heavy textures, it may not grip well or may show bumps through thin paper.
Fresh paint. New paint needs time to cure fully. Applying too soon can trap solvents, weaken adhesion,n and make removal more likely to lift paint. Many manufacturers recommend waiting about four weeks; check your product’s instructions.
High humidity. Steamy bathrooms without good ventilation can loosen edges and seams over time.
Heat. Areas right behind stoves, near radiators,rs or in strong direct sun can soften adhesive or cause fading.
Flat or matte paint and low-quality paint. Very porous or chalky finishes may grip poorly or lift with the paper. Eggshell, satin, and semi-gloss usually perform better.
Peel and Stick vs Traditional Wallpaper
| Peel and stick | Traditional (paste) | |
|---|---|---|
| Installation | Easy, DIY-friendly | Takes more skill and tools |
| Mess | Minimal | Paste, water and sponges |
| Removal | Designed to peel off | Often needs steaming or scoring |
| Durability | Good for years in the right room | Very long-lasting when installed well |
| Humidity tolerance | Moderate | Better with the right paper and paste |
| Pattern and paper quality | Wide range, from thin vinyl to premium | Widest range, including luxury papers |
| Cost per roll | Often lower per roll, but rolls are smaller | Varies widely |
Peel-and-stick wallpaper is ideal when you want flexibility. Traditional wallpaper wins when you want a long-term, premium finish, especially in demanding rooms.
There’s also a middle option: paste-the-wall wallpaper, where you roll paste onto the wall and hang dry paper. It’s easier than traditional paper, and many types strip off cleanly when dry.
Choosing the Right Product
Material
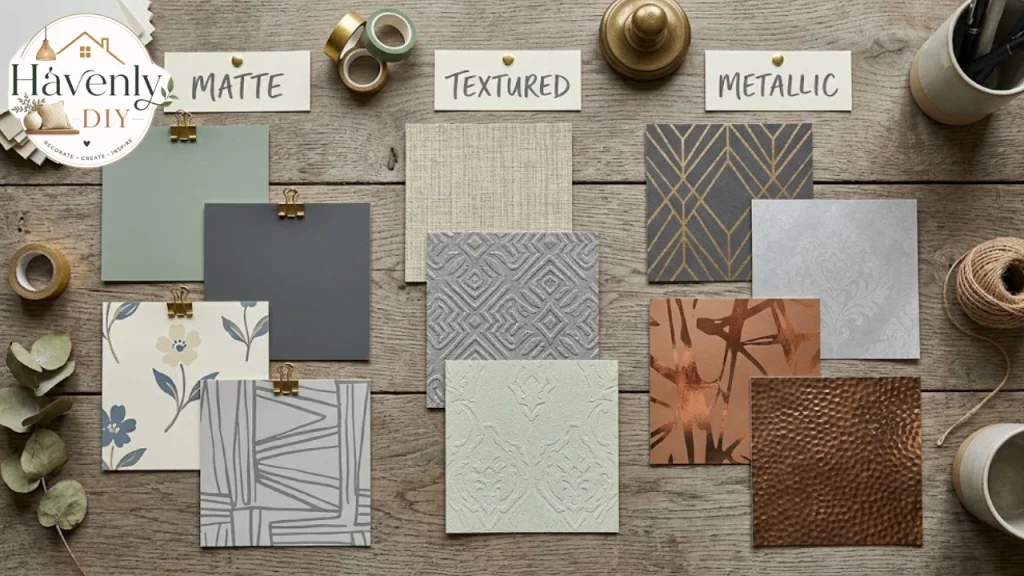
Most peel-and-stick wallpapers are vinyl or vinyl-coated. Thicker vinyl hides minor wall flaws better and is easier to handle without wrinkling.
Some brands offer textured, grasscloth-look or fabric-like finishes. These look richer but can be harder to match at seams.
Finish
Matte finishes look more like traditional paper and hide imperfections. Satin and gloss finishes are easier to wipe clean but show bumps and seams more clearly.
Pattern and Repeat
Check the pattern repeat, the vertical distance before the pattern starts again, listed in inches or centimeters.
Large repeats look dramatic but create more waste, because each panel must be shifted to line up. Small or random patterns are more forgiving for beginners.
Pattern match types matter too. A straight match lines up horizontally across panels. A drop match shifts every other panel, which needs more material.
Roll Size and Coverage
Roll sizes vary a lot between brands. Some rolls cover about 28 square feet, others more or less. Always calculate coverage from the product’s own listed dimensions, not from a general rule.
How Much Do You Need?
Measure the width of each wall you’ll cover and add them together.
Measure the wall height. Multiply width by height to get the total area in square feet.
Subtract large openings like doors and windows only if you’re confident in your layout; many people don’t subtract, to be safe.
Divide by the coverage per roll. Add 10 to 15 percent for waste, mistakes, and pattern matching. Add more for large repeats.
Example: a 12-foot-wide wall that’s 8 feet high is 96 square feet. With a roll covering 28 square feet, you need about 3.4 rolls, so buy 4, plus extra for pattern matching. Ordering 5 is safer for a bold repeat.
Buy all your rolls at once. Colors can vary slightly between production batches, so check that the batch or lot numbers match.
What You’ll Need
- Peel and stick wallpaper
- A level or laser level
- Pencil
- Measuring tape
- A plastic smoothing tool or squeegee, ideally with a felt edge
- A sharp utility knife with plenty of fresh blades
- A straightedge or wide putty knife for trimming
- A step ladder
- Mild cleaner and a lint-free cloth
Change blades often. A dull blade tears rather than cuts, which is one of the most common reasons for messy edges.
How to Install Peel and Stick Wallpaper
Prepare the Wall
Remove outlet and switch covers, with the power to those circuits turned off for safety. Fill small holes and sand them smooth. Clean the wall with a mild detergent solution to remove dust and grease, then let it dry completely.
If you’ve just painted, wait for the paint to cure fully, as recommended by both the paint and wallpaper manufacturers.
Test a Small Piece
Apply a small sample in a hidden spot. Leave it for a day or two, then peel it off. This shows how well it sticks and whether it lifts any paint.
Draw a Plumb Line
Walls and corners are rarely perfectly straight. Use a level to draw a vertical line about one panel’s width from your starting corner, minus a little overlap.
Hang the first panel to this line, not to the corner. Every panel after it depends on this one being straight.
Hang the First Panel
Peel back about 12 inches of the liner from the top. Align the edge with your plumb line, leaving a little extra at the ceiling to trim later.
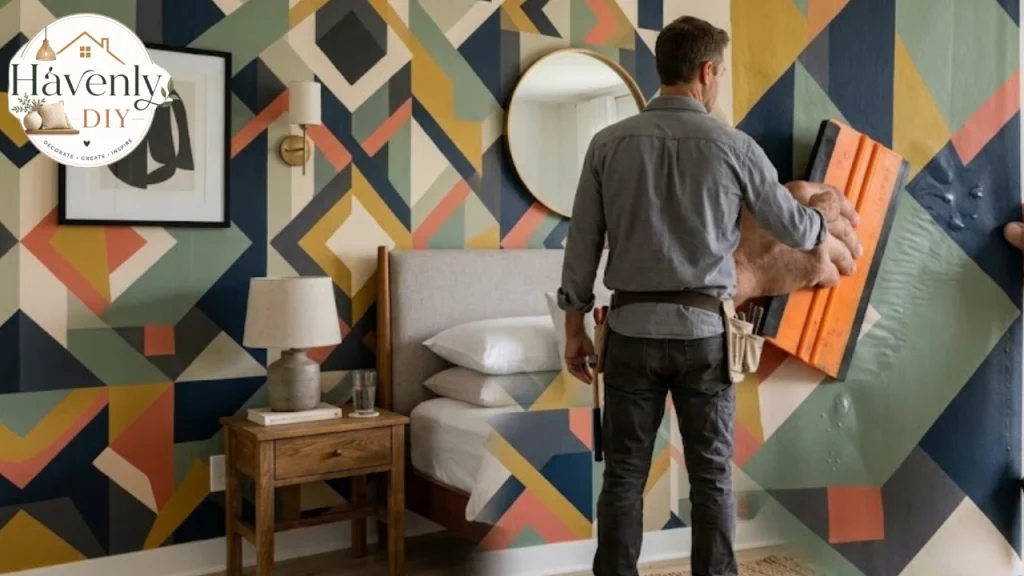
Press the top in place, then slowly pull the liner down with one hand while smoothing with the tool in the other, working from the center outward to push out air.
Hang the Next Panels
Line up each new panel with the pattern and seam of the previous one. Follow the manufacturer’s instructions on whether to overlap slightly or butt the edges together.
Smooth from the center outward, then run the smoothing tool firmly along each seam.
Trim the Edges
Use a straightedge and a sharp blade to trim at the ceiling, baseboards, and corners. Hold the straightedge firmly and cut in one smooth pass.
Work Around Outlets and Switches
With the power still off, smooth the panel over the opening, cut a small X over the box, then trim neatly around the edges. Replace the cover plate once you’re done.
Final Check
Press over the entire wall again, especially edges and seams. Push small bubbles toward the nearest edge; prick stubborn ones with a pin and smooth them flat.
Tips for a Professional Finish
Start in the least noticeable corner. The final seam rarely matches perfectly, so end where it’s hidden, such as behind a door.
Work with a helper. Long panels are easier to handle with one person peeling and one person smoothing.
Don’t stretch the paper. Vinyl can stretch, then shrink back and leave gaps at seams.
Keep the room at a moderate temperature. Very cold rooms can reduce initial tack; very hot rooms can make adhesive too soft.
Label your panels. Number the back of each cut panel so the pattern sequence stays in order.
Choose the wall carefully. A single accent wall with good light is far more forgiving than wrapping four walls around windows and doors.
Peel and Stick Wallpaper in Bathrooms and Kitchens
Bathrooms and kitchens are popular for removable wallpaper, but they need more care.
In a bathroom, peel and stick wallpaper generally does best in powder rooms and half baths without a shower. In full bathrooms, run the exhaust fan during and after every shower, keep the paper away from direct water spray, and choose a product rated for humid spaces.
For more inspiration, our guide to bathroom wallpaper covers patterns and placements that suit wet rooms. It pairs well with warm, natural looks like our rustic bathroom ideas and compact layouts like our small bathroom vanity guide.
In kitchens, avoid areas directly behind the cooktop, where heat and grease build up. Peel and stick is more successful on a dining nook wall, the back of open shelves,s or glass-front cabinets. If you want to update cabinets too, our modern kitchen cabinets guide has ideas that work alongside a patterned wall.
Creative Ways to Use Peel and Stick Wallpaper
You don’t have to cover a whole wall to get impact.
Ceilings. A subtle pattern on a bedroom or dining room ceiling feels unexpected and cozy. It’s a harder install, so choose a forgiving pattern and get help.
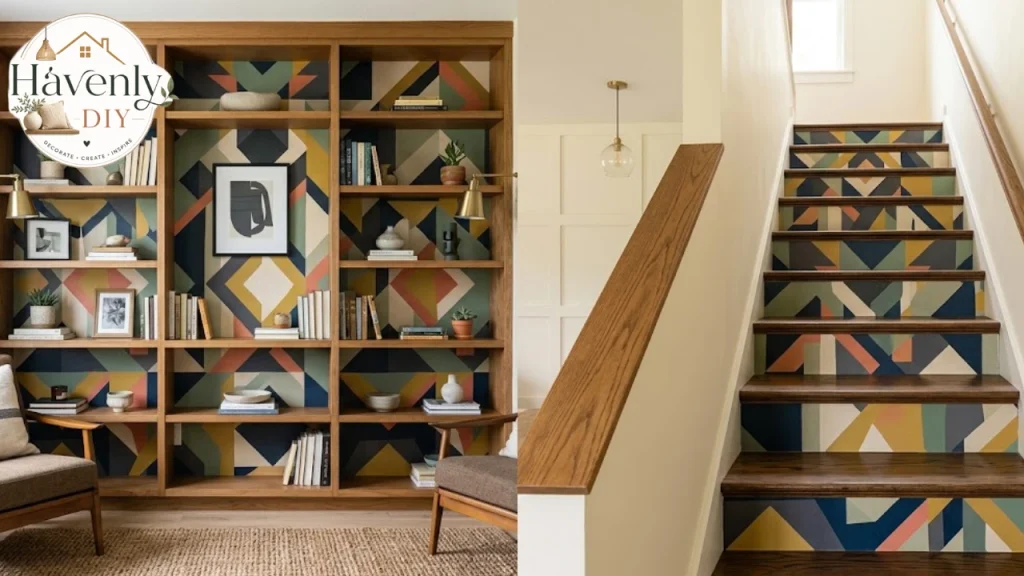
Bookcase backs. Line the back panel of shelves to make books and objects stand out.
Stair risers. A patterned strip on each riser makes a staircase a feature.
Doors. Interior doors, closet doors,rs and even a front door’s inner side can carry a bold print.
Headboard effect. Cover a panel of wall behind the bed in the shape of a headboard instead of buying one.
Drawer and cabinet linings. A hidden pop of pattern every time you open a drawer.
Laundry rooms and closets. Small utility spaces can take bold patterns cheaply. Our laundry room cabinets guide shows how a patterned wall can lift a practical room.
Choosing Patterns by Room and Style
The right pattern depends on the room’s size, light, and style.
Small rooms. Bold patterns can make a small room feel cozy and intentional rather than cramped, especially in powder rooms and closets. Light backgrounds keep it airy.
Large rooms. Large-scale patterns or murals hold their own on big walls.
Bedrooms. Botanical prints, soft florals, and muted earthy tones help a bedroom feel restful. Our earthy bedroom ideas show palettes that pair well with wallpaper.
Living rooms. Geometrics, grasscloth looks, and murals create a focal wall.
Kids’ rooms. Removable paper is ideal here, since tastes change fast.
Choose colors that connect to the rest of the home. Our guide to home color combinations can help you pick a pattern that ties in with nearby rooms.
How to Remove Peel and Stick Wallpaper
The removal promise is a big part of the appeal, so do it carefully.
Start at a top corner. Lift a corner gently with a fingernail or plastic putty knife.
Peel slowly at a low angle. Pull the paper back along the wall, close to parallel with the surface, rather than straight out toward you.
Warm stubborn areas. If it resists, warm it briefly with a hair dryer on low to soften the adhesive.
Clean any residue. Wipe leftover adhesive with warm soapy water. Test any adhesive remover on a hidden spot first so it doesn’t damage the paint.
Touch up if needed. Small paint lifts can be patched with matching touch-up paint.
The longer wallpaper stays up, and the more heat and sun it gets, the stronger the bond can become. Removal is usually easiest within the first couple of years.
How Long Does It Last?
In a dry, stable room on a properly prepared wall, good-quality peel and stick wallpaper can last for years.
Signs it’s time to replace it include edges that keep lifting, visible fading, seams that open repeatedly, or a pattern you’re simply tired of, which is half the point of choosing it.
Keep a spare roll from the same batch so you can patch damaged sections later.
What Does It Cost Compared With Paint?
Prices vary widely by brand and material, so treat this as a way to compare rather than a quote. A gallon of good interior paint covers a typical accent wall with room to spare, and it usually costs less than the rolls you’d need for the same wall.
So why pay more? Because peel-and-stick wallpaper gives you pattern, texture, and detail that paint can’t, without hiring a decorator or committing to paste.
Think about the full cost, not just the rolls:
Extra rolls for pattern matching. Large repeats waste more paper . Tools. A smoother, a sharp utility knife, and spare blades.
Wall prep. Primer or patching compound if the surface needs work.Your time. One accent wall is a weekend job. A whole room takes longer.
For renters, the math often favors wallpaper anyway. Painting a rental usually means repainting before you move out. Removable paper can skip that step if it comes down cleanly.
Cleaning and Everyday Care
Most self-adhesive papers are wipeable, but “wipeable” isn’t the same as “scrubbable.” Check the label before you reach for a sponge.
For routine cleaning, dust with a soft dry cloth or a vacuum brush attachment. For marks, use a barely damp microfiber cloth with a drop of mild dish soap, then dry the area right away.
Avoid abrasive pads, bleach, and harsh solvents. They can dull the finish, smear the print,t or weaken the adhesive at the seams.
If an edge starts to lift, press it back firmly with a smoother. A thin line of clear wallpaper seam adhesive can hold a stubborn corner in place, though it may make that spot harder to remove later.
In bathrooms and kitchens, run the fan and wipe away splashes quickly. Moisture sitting on the seams is what usually makes peel-and-stick wallpaper fail early in these rooms.
A Quick Checklist for Renters
Before the first panel goes up, run through this list:
Read your lease or ask your landlord in writing.
Take photos of the bare wall, so you have a record of its condition.
Test removal on a small hidden patch and leave it up for a week or two.
Ask for the paint name or color code so you can touch up later.
Choose low-tack products marketed as renter-friendly.
Plan your move-out time. Removal takes longer than you think, so don’t leave it for the last day.
Done this way, peel-and-stick wallpaper is one of the few upgrades that can make a rental feel like yours without putting your deposit at risk.
Common Mistakes to Avoid
Skipping wall prep. Dust and grease are the main causes of poor adhesion.
Applying over fresh paint. It can trap solvents and lift paint when removed.
Starting in the corner without a plumb line. One crooked panel throws off the whole wall.
Using a dull blade. It tears the paper and leaves ragged edges.
Buying too little. Running short mid-project can leave you with mismatched batches.
Choosing the wrong room. A steamy family bathroom or the wall behind a stove will test any adhesive.
Pulling straight out during removal. Peeling at a steep angle is more likely to lift paint.
FAQs:
Does peel and stick wallpaper damage walls?
It’s designed not to, but results depend on the product, your paint, and how you remove it. Test a hidden spot, let new paint cure fully, and peel slowly at a low angle.
Is peel and stick wallpaper good for renters?
It’s one of the most popular renter-friendly decorating options. Check your lease first, test removal on a small area, and keep spare paint for touch-ups.
Can you use peel and stick wallpaper in a bathroom?
Yes, especially in powder rooms. In full bathrooms, use good ventilation, avoid direct water spray, and choose a product suited to humid rooms.
How do you fix bubbles in peel and stick wallpaper?
Light texture can work with thicker paper. Heavy texture usually prevents good adhesion and shows through the paper.
How long should paint cure before applying wallpaper?
Follow the manufacturer’s guidance. Many recommend waiting around four weeks after painting.
Can you paint over peel and stick wallpaper?
It’s not usually recommended. Most vinyl surfaces don’t hold paint well, and painting makes removal much harder.
How do you fix bubbles in peel-and-stick wallpaper?
Push small bubbles toward the nearest edge with a smoothing tool. Prick stubborn ones with a pin and press flat.