

Open a drawer to grab a wooden spoon, and you find rubber bands, dead batteries, three bottle openers, and last month’s receipt. Sound familiar? Almost every kitchen has its own “junk drawer.” The problem is that, little by little, that drawer’s clutter spreads to the cabinets, pantry, and countertops.
The good news is that you don’t need a new kitchen. You need a method. In this guide, we’ll look at how to organize your kitchen zone by zone, from cabinets to the refrigerator, with solutions designed for real life: small kitchens, rental homes, and families with children.
The Short Answer
To organize your kitchen, empty one area at a time and remove everything you no longer use. Then divide the kitchen into work zones: storage, washing, food preparation, cooking, and serving. Keep each item close to where you use it, placing everyday essentials between hip and shoulder height.
Group similar items together, use drawer dividers and transparent containers, and label your pantry. Finally, spend ten minutes a day putting everything back in its place. That’s the basic approach to organizing your kitchen so it stays tidy.
Empty First, Then Decide
The most common mistake is buying storage containers before knowing what needs to go inside them. Organizing clutter without getting rid of anything simply moves the mess around.
Work area by area rather than tackling the entire kitchen in one day. One cabinet, one drawer, or one pantry shelf at a time is manageable; trying to organize the whole kitchen in a single afternoon usually means leaving the job half-finished.
Prepare three boxes: keep, give away or donate, and throw away or recycle. Then take everything out and ask yourself these questions about each item:
- Have I used it in the past year?
- Do I have a duplicate that works better?
- Is it broken, chipped, or expired?
Common items to remove include promotional mugs, containers without lids, spices that have been open for years, and appliances used only once. Don’t feel guilty: every item you remove frees up space for the things you actually use.
Seasonal items, such as Christmas cookie cutters or special-occasion dinnerware, can be stored in a cupboard outside the kitchen, in the basement, or in the attic.
Divide Your Kitchen into Zones
A kitchen works well when every activity has its own area. Think about how food moves through your kitchen: from grocery shopping to the refrigerator, to the sink, to the cutting board, to the stove, and finally to the table.
| Zone | Location | What Belongs There |
|---|---|---|
| Storage | Refrigerator, pantry, tall cabinets | Fresh and dry foods, запас supplies |
| Washing | Sink and dishwasher | Dish soap, dishcloths, colanders, dish racks |
| Preparation | Countertop between the sink and stove | Cutting boards, knives, bowls, kitchen scales, utensils |
| Cooking | Stovetop and oven | Pots, pans, ladles, oils, salt, spices |
| Serving | Near the dining table or dishwasher | Plates, glasses, cutlery, table linens |
Designers often refer to the work triangle: the refrigerator, sink, and stovetop should be close enough to reach in a few steps but not placed directly next to one another. Even if you can’t move them, you can arrange your kitchen items to reduce unnecessary walking.
Here’s a practical example: keep plates and glasses near the dishwasher so unloading it takes just a minute. Store the colander next to the sink, not at the back of the pantry. Understanding how to organize your kitchen by zones is the step that truly makes a difference. Everything else follows from there.
The Rule of Frequency of Use
After organizing zones, the second principle is simple: items you use every day should be easier to reach than those you use once a month. Think in terms of three height levels: The golden zone, between hip and shoulder height: Everyday items such as plates, glasses, mugs, cutlery, and the stovetop coffee maker.
The upper zone, on the top cabinet shelves: Rarely used items, such as serving trays, baking molds, and extra supplies.The lower zone, in base cabinets and deep drawers: Heavy items such as pots, pans, and kitchen appliances.
Another useful rule is “like with like.” Keep all your glasses together, all your baking trays together, and all your jars of beans together. When each group has its own designated place, tidying up becomes automatic.
How to Organize Kitchen Cabinets
Wall cabinets are convenient for plates and glasses, but they can quickly become chaotic when items are stored in two rows. Avoid double rows. Items at the back tend to be forgotten. If your shelves are deep, use shelf risers or additional shelves to create two levels instead of stacking items in two rows.
Keep plates and glasses near the dishwasher. Place dinner plates and soup plates on the middle shelf, everyday drinking glasses within easy reach, and wine glasses or special-occasion dinnerware higher up. Keep mugs and your coffee maker together.
Create a dedicated breakfast corner in a single cabinet with mugs, coffee, sugar, tea, and biscuits. You won’t need to open three different cabinet doors in the morning. If you’re considering updating your kitchen cabinets, our ideas for modern kitchen cabinets and cupboards showcase solutions with pull-out shelves and lift-up doors that make organization easier.
How to Organize Base Cabinets and Deep Drawers
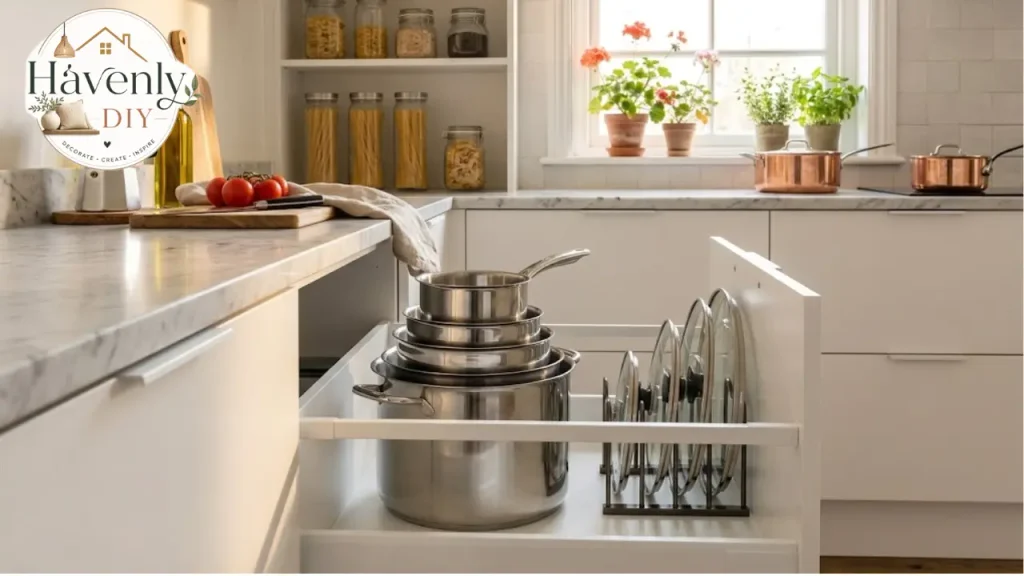
Base cabinets are the right place for heavy items, but a cabinet with just one fixed shelf can easily become a black hole. Choose deep drawers over cabinet doors when possible. A pull-out drawer lets you see everything from above. If you only have cabinets with doors, add baskets or pull-out shelves.
Store pots and pans vertically or stack them carefully. Stack pots from largest to smallest, placing a cloth or pan protector between them if they have a nonstick coating.
Keep lids separate. Lids are the real nightmare of base cabinets. A vertical lid organizer, placed inside a deep drawer or mounted on the cabinet door, solves the problem in just a few minutes. Store baking trays and cutting boards upright. A simple vertical divider allows you to remove one tray without having to move all the others.
How to Organize Kitchen Drawers
Kitchen drawers are small, but they’re among the spaces you open most often. A few drawer dividers are all it takes to transform them.
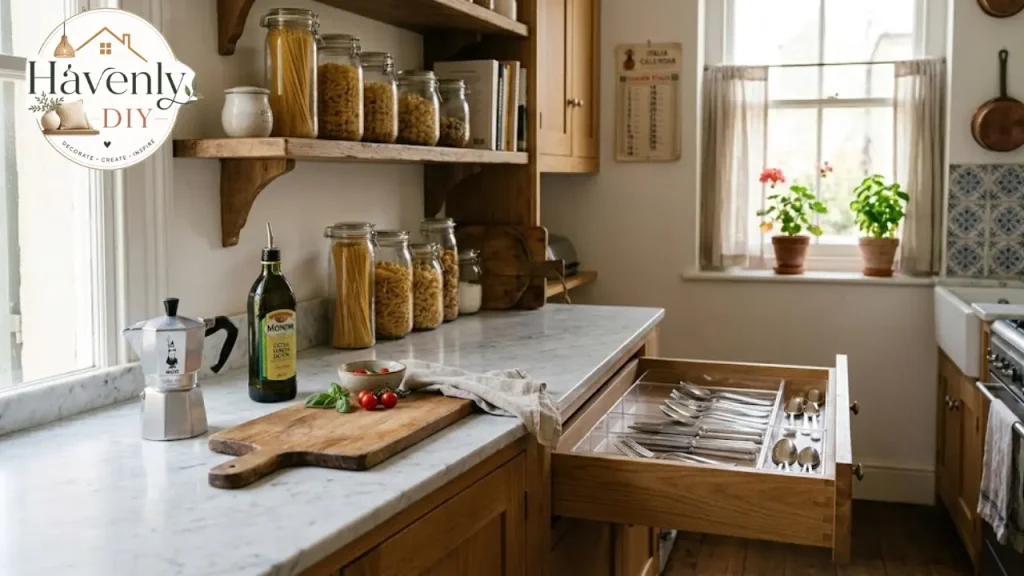
First drawer: Cutlery. The top drawer, closest to the dishwasher or dining table, is perfect for everyday cutlery. Second drawer: Utensils. Store ladles, spatulas, tongs, vegetable peelers, and whisks near the stove. The utensils you use most often can also be kept in a jar on the countertop.
Food preparation drawer: Store plastic wrap, baking paper, aluminum foil, food storage bags, and bag clips here. Knives: Never leave knives loose in a drawer. Use a knife block, a wall-mounted magnetic strip, or a dedicated drawer insert to protect both the blades and your fingers.
The junk drawer: You don’t have to eliminate it; you just need to keep it under control. Keep only one junk drawer, with small dividers for scissors, adhesive tape, pens, and rubber bands, and empty it once a month.
How to Organize Spices
Spices are small, numerous, and often look alike. That’s why they’re so easy to lose track of. Keep them near the stove but not directly above it, as heat and steam can damage their aroma more quickly. A shallow drawer with the spice jars laid flat and their labels facing up is the most practical solution.
If you prefer a wall cabinet, use a tiered shelf or a lazy Susan so you can see the spices at the back, too. Arrange them alphabetically or by frequency of use, keeping everyday spices at the front and those used for special recipes at the back.
Salt, pepper, and extra-virgin olive oil deserve a permanent place beside the stovetop. You use them with almost every meal.
How to Organize Your Refrigerator
The temperature inside a refrigerator is not the same everywhere. Knowing where to store each item helps food stay fresh for longer.
| Refrigerator Zone | What to Store There |
|---|---|
| Upper shelves | Cooked food, leftovers, opened dairy products |
| Middle shelves | Milk, yogurt, cheese, eggs |
| Bottom shelf, above the drawers | Raw meat and fish, securely sealed, in the coldest area |
| Drawers | Fruit and vegetables, separated if possible |
| Door | Drinks, sauces, butter, and condiments |
The door is the warmest area, so it is not the ideal place for eggs or milk if you consume them slowly. The recommended temperature for a household refrigerator is generally around 4°C (39°F); check your model’s manual for specific guidance.
Use transparent containers for leftovers and write the date on the lid. Once a week, before grocery shopping, check everything and use the oldest foods first. Don’t overfill the refrigerator. Air needs to circulate so the fridge can cool everything evenly.
How to Organize the Space Under the Sink and Your Recycling
The space under the sink is one of the most awkward areas in the kitchen: it’s deep, dark, and occupied by pipes. That’s exactly why it needs careful organization. Protect the bottom. A waterproof mat or plastic tray protects the cabinet from minor leaks. Check the pipes occasionally, as even a small, unnoticed drip can damage the cabinet.
Make use of vertical space. A two-tier shelf shaped to fit around the drainpipe can double the available storage space. On the inside of the cabinet door, you can hang a bag holder or a small basket for sponges and gloves.
Keep cleaning products in a handled caddy. You can pull everything out together when cleaning and put it back with a single movement. Think about safety. If you have young children at home, install a childproof lock on the cabinet door or move cleaning products to a high wall cabinet.
Recycling Without Creating Clutter
In Italy, waste separation is part of everyday life, and organizing it properly prevents bags from accumulating on the floor. The most common categories are organic waste, plastic and metals, paper and cardboard, glass, and general waste.
The rules vary from one municipality to another, so always follow your local collection calendar and guidelines. To manage recycling in a small space: Organic waste and plastic: Since you produce these every day, keep them under the sink or in a deep drawer with pull-out bins.
Paper and glass: These accumulate more slowly, so store them in a tall container outside the kitchen, such as in a utility closet or on a balcony. Stackable containers or pedal bins: Use these if there isn’t enough room under the sink. Quickly rinsing jars and food containers before throwing them away helps prevent unpleasant odors, especially in summer.
The Countertop: What to Keep Out
A clear countertop makes the kitchen look bigger and makes cooking and cleaning easier. Keep out only the items you use every day: your moka pot or coffee machine, your main cutting board, salt, pepper, and oil, plus a container for your most frequently used utensils.
Everything else should be stored away. Appliances used once a week, such as a blender or stand mixer, can go in a nearby base cabinet. Appliances used once a year, such as an ice cream maker or waffle iron, can be stored outside the kitchen.
A tray helps group the items you leave on the countertop. When it’s time to clean, simply lift the tray and wipe the surface in seconds.
How to Organize a Small Kitchen
In a small kitchen, every inch counts, but the solutions are simpler than they might seem. Learning how to organize a kitchen when space is limited is mainly about thinking vertically.
Use the walls. A rail with hooks underneath the wall cabinets keeps ladles, dish towels, and mugs within easy reach. A magnetic knife strip frees up an entire drawer. Make use of the inside of cabinet doors. Hooks and small adhesive organizers can hold lids, thin cutting boards, and food wrap.
Add a high shelf. A shelf above the window or door can hold rarely used items or decorative jars. Choose stackable and foldable items. Nesting bowls, collapsible colanders, and stackable containers take up much less space.
Use a rolling cart. A narrow, tall cart can slide between the refrigerator and the wall, creating a mini pantry. A larger cart can also serve as extra countertop space. Reduce duplicates. In a small kitchen, there’s no room for four spatulas and three graters. Keep the best ones and donate the rest.
How to Organize Your Pantry
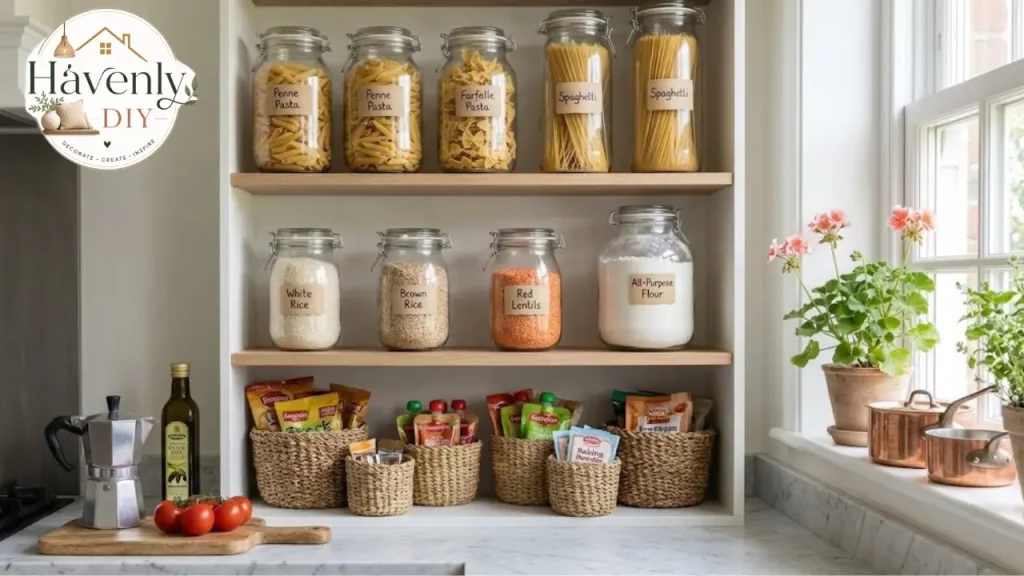
An organized pantry saves time and money because you can see what you already have before buying more. Group items by category. Keep pasta and rice, beans and canned goods, breakfast foods, flour and baking powder, snacks, sauces, and preserved vegetables together. Assign each category its own shelf or container.
First in, first out. When putting away groceries, place products with the nearest expiration dates at the front and newer items at the back. This is the same principle used in stores and helps reduce waste.
Use transparent containers and labels. Storing pasta, rice, flour, and cereals in clear containers lets you see at a glance when supplies are running low. Label each container with its contents and expiration date, and, if you like, include cooking times as well.
Use baskets for small items. Sachets of baking powder, stock cubes, and bags of dried fruit and nuts won’t get lost at the bottom of the pantry when kept in a basket.
If you don’t have a dedicated pantry, a tall cabinet with pull-out baskets, a designated wall cabinet, or even a narrow shelving unit beside the refrigerator can serve the same purpose.
In a kitchen with open shelving, glass jars and natural baskets can also become decorative features. Our ideas for a coastal-style kitchen showcase several examples.
Explaining how to organize a kitchen without discussing the pantry would be like organizing a wardrobe without touching the sock drawer: that’s where the clutter tends to hide.
Open-Plan Kitchens, Rental Homes, and Kitchens with Children
Open-Plan Kitchens and Living Spaces
When the kitchen is visible from the living room, keeping it organized also becomes a matter of aesthetics. Hide as much as possible behind cabinet doors and leave only a few attractive items on display, such as glass jars, wooden cutting boards, and an aromatic herb plant.
Choose containers and accessories in a few colors that coordinate with the rest of your living space. Our guide to home color combinations can help you find a color palette that brings your kitchen and living room together.
Organizing a Rental Kitchen
When renting, you may not be allowed to drill holes in the walls or replace the cabinets, but there’s still plenty you can do. Here’s how to organize your kitchen without renovations: use removable adhesive hooks, freestanding cabinet organizers, adjustable drawer dividers, and a rolling cart.
Before using adhesive products, test them on a hidden spot to make sure they can be removed without leaving marks. It’s also a good idea to keep a few photos of what the kitchen looked like when you moved in.
Organizing a Kitchen with Children
When children are around, kitchen organization is also a matter of safety. Keep knives, cleaning products, and medications on high shelves or behind safety locks.
On the other hand, you can create a low drawer just for them, containing unbreakable plates and cups and a few healthy snacks. This helps children become more independent and learn to set the table on their own.
Mistakes to Avoid
Buying containers before decluttering. You’ll end up with attractive jars filled with things you never use. Filling every available space. A cabinet packed to the last inch is difficult to keep organized. Always leave a little room to spare.
Organizing just once. Without a simple routine, clutter returns within a few weeks. Copying social media photos. The perfect kitchens you see online are often not used every day. Organize your kitchen around the way you actually cook, not how it looks in a photograph.
Forgetting who uses the kitchen. If several people cook at home, involve them in the process. A system that only you understand won’t last long.
How to Keep Your Kitchen Organized
Getting organized is the first step. The real secret to keeping your kitchen organized in the long term is maintenance, and it only takes a few minutes. Every day: 10 minutes. After dinner, put everything back in its place, empty the sink, and clear the countertops. The next morning, you’ll find a kitchen that’s ready to use.
Every week, before grocery shopping. Check the refrigerator and pantry, discard expired food, and write your shopping list. You’ll save time and reduce food waste. Every season. Go through cabinets and drawers one at a time. Remove anything you haven’t used and put misplaced items back where they belong.
A golden rule: Whenever a new item comes in, consider whether an old one can go out. It’s the simplest way to avoid returning to square one. For more cleaning and organizing routines, you can explore our home cleaning guides.
FAQs:
Where should you start when organizing a kitchen?
Start by emptying and sorting one area at a time, such as a drawer or cabinet. Remove anything you no longer use, then divide the kitchen into zones and assign a designated place to each group of items.
What should go in wall cabinets and what should go in base cabinets?
Wall cabinets are suitable for plates, glasses, mugs, lightweight food items, and rarely used items on the upper shelves. Base cabinets are best for pots, pans, small appliances, and heavy items.
How do you organize a small kitchen without a pantry?
Use a narrow tall cabinet or a rolling cart as a pantry, make use of walls with rails and shelves, and choose stackable containers. Minimize duplicate items to save space.
How should you organize pots and lids?
Stack pots from largest to smallest in a deep drawer and keep the lids in a vertical lid organizer inside the drawer or on the inside of the cabinet door.
How can you keep your kitchen tidy all the time?
Spend ten minutes every evening putting everything back in its place, check the refrigerator and pantry once a week, and do a complete review at the start of each new season.
Where should you store cleaning products in the kitchen?
Usually, under the sink in a handled caddy. If you have young children, install a safety lock or move the products to a high wall cabinet.